

How To Draw A Fish Eye
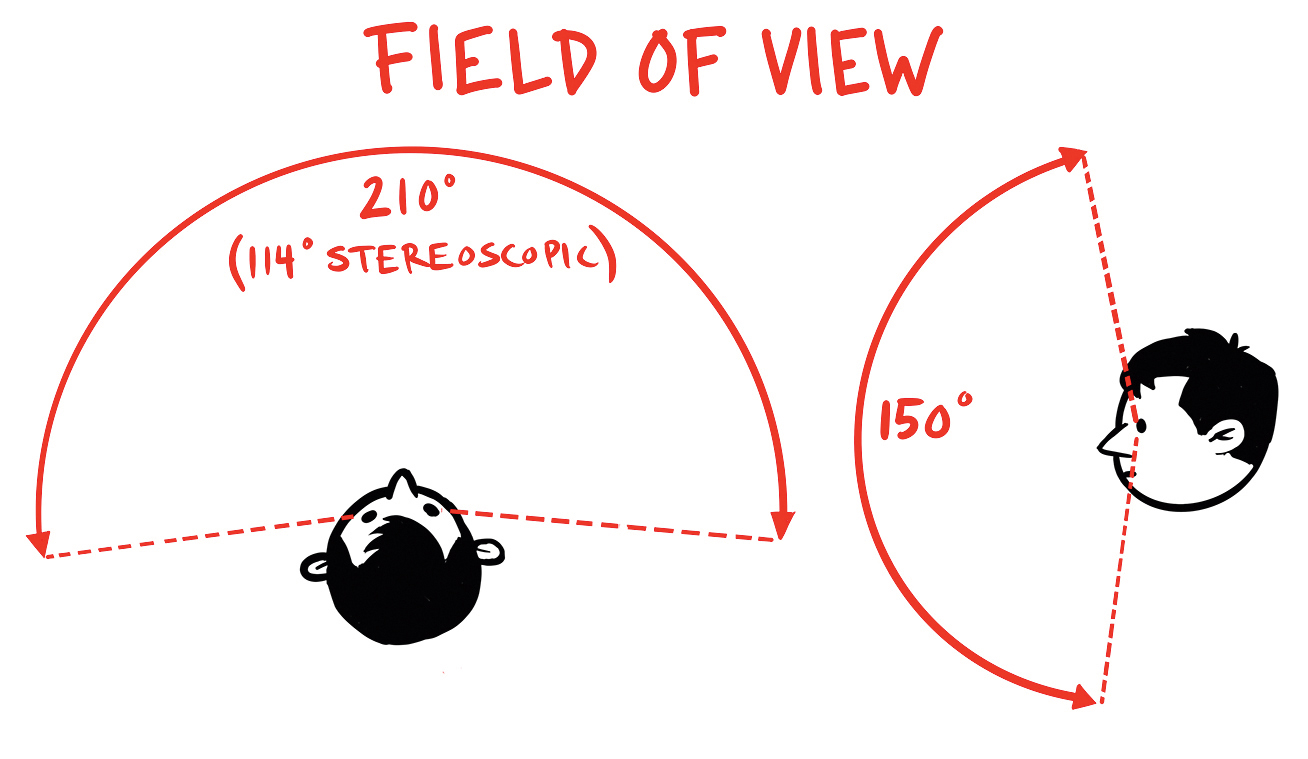
Odds are past now you have encountered 5-point perspective, or broad-angle or fisheye perspective, earlier. Whether y'all've heard information technology called fish-heart, chimera art, curvilinear perspective or something else, the idea is the aforementioned: to fit a lot of space on the page you take to bend that space a bit. There are a few ways to get nigh doing that, and I'm going to show you lot how I like to approach a wide angle cartoon or "point of view" sketch in a few unproblematic steps.
Before you lot get into the training, why not catch-up on some other unique drawing skills? Take a look at these tips for isometric cartoon or discover some core skills; Artistic Bloq has advice for pencil cartoon techniques, likewise.
Years ago, when I first started doing sketches from life, I was trying to depict a row of buildings from across the street. I wanted to include everything I could see; the whole city block. I sketched the top and bottom edges of the buildings parallel to the horizon but it just didn't look right.
Then I remembered how buildings in panoramic photos are wider at the centre and they taper down to the right and left as they recede from the viewer. In doing this, the top and lesser edges of the buildings curve to run into vanishing points on the horizon to the right and left. I tried this in my sketch and it worked!
Continue reading to learn how to add as much detail into a scene as you can using the wide-angle perspective cartoon technique that emulates how the eye works. Let'southward get started…
How to draw 5-bespeak perspective
01. Select a suitable space

(Image: © Paul Heaston)
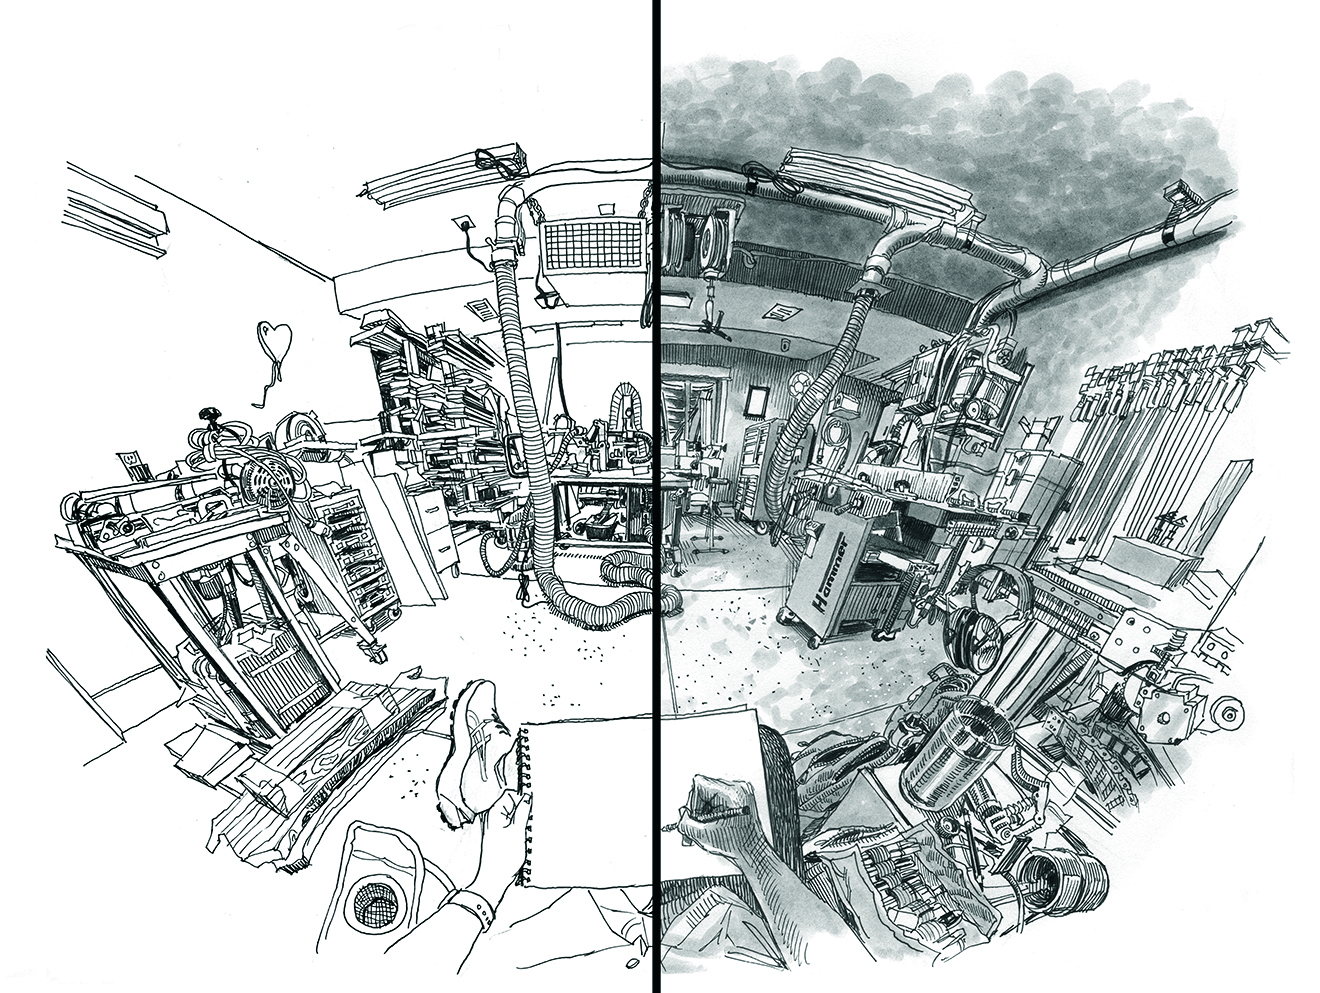
You can exercise a wide-angle sketch in practically any outdoor or indoor space, but for sheer volume of item in all directions I love a chaotic interior space. I chose to sketch my friend'due south woodworking shop because there was just so much visual information in every corner of the room.
02. Adopt a broad-angle mindset
(Image: © Paul Heaston)
This is the most challenging yet crucial stride in tackling a wide-bending sketch from life. We're used to zooming and cropping to select pocket-sized portions of our field of view to render on the page. Recall "broad" – your drawing will include what'southward to your right and left and what's above and below you.
03. Draw a curved perspective filigree
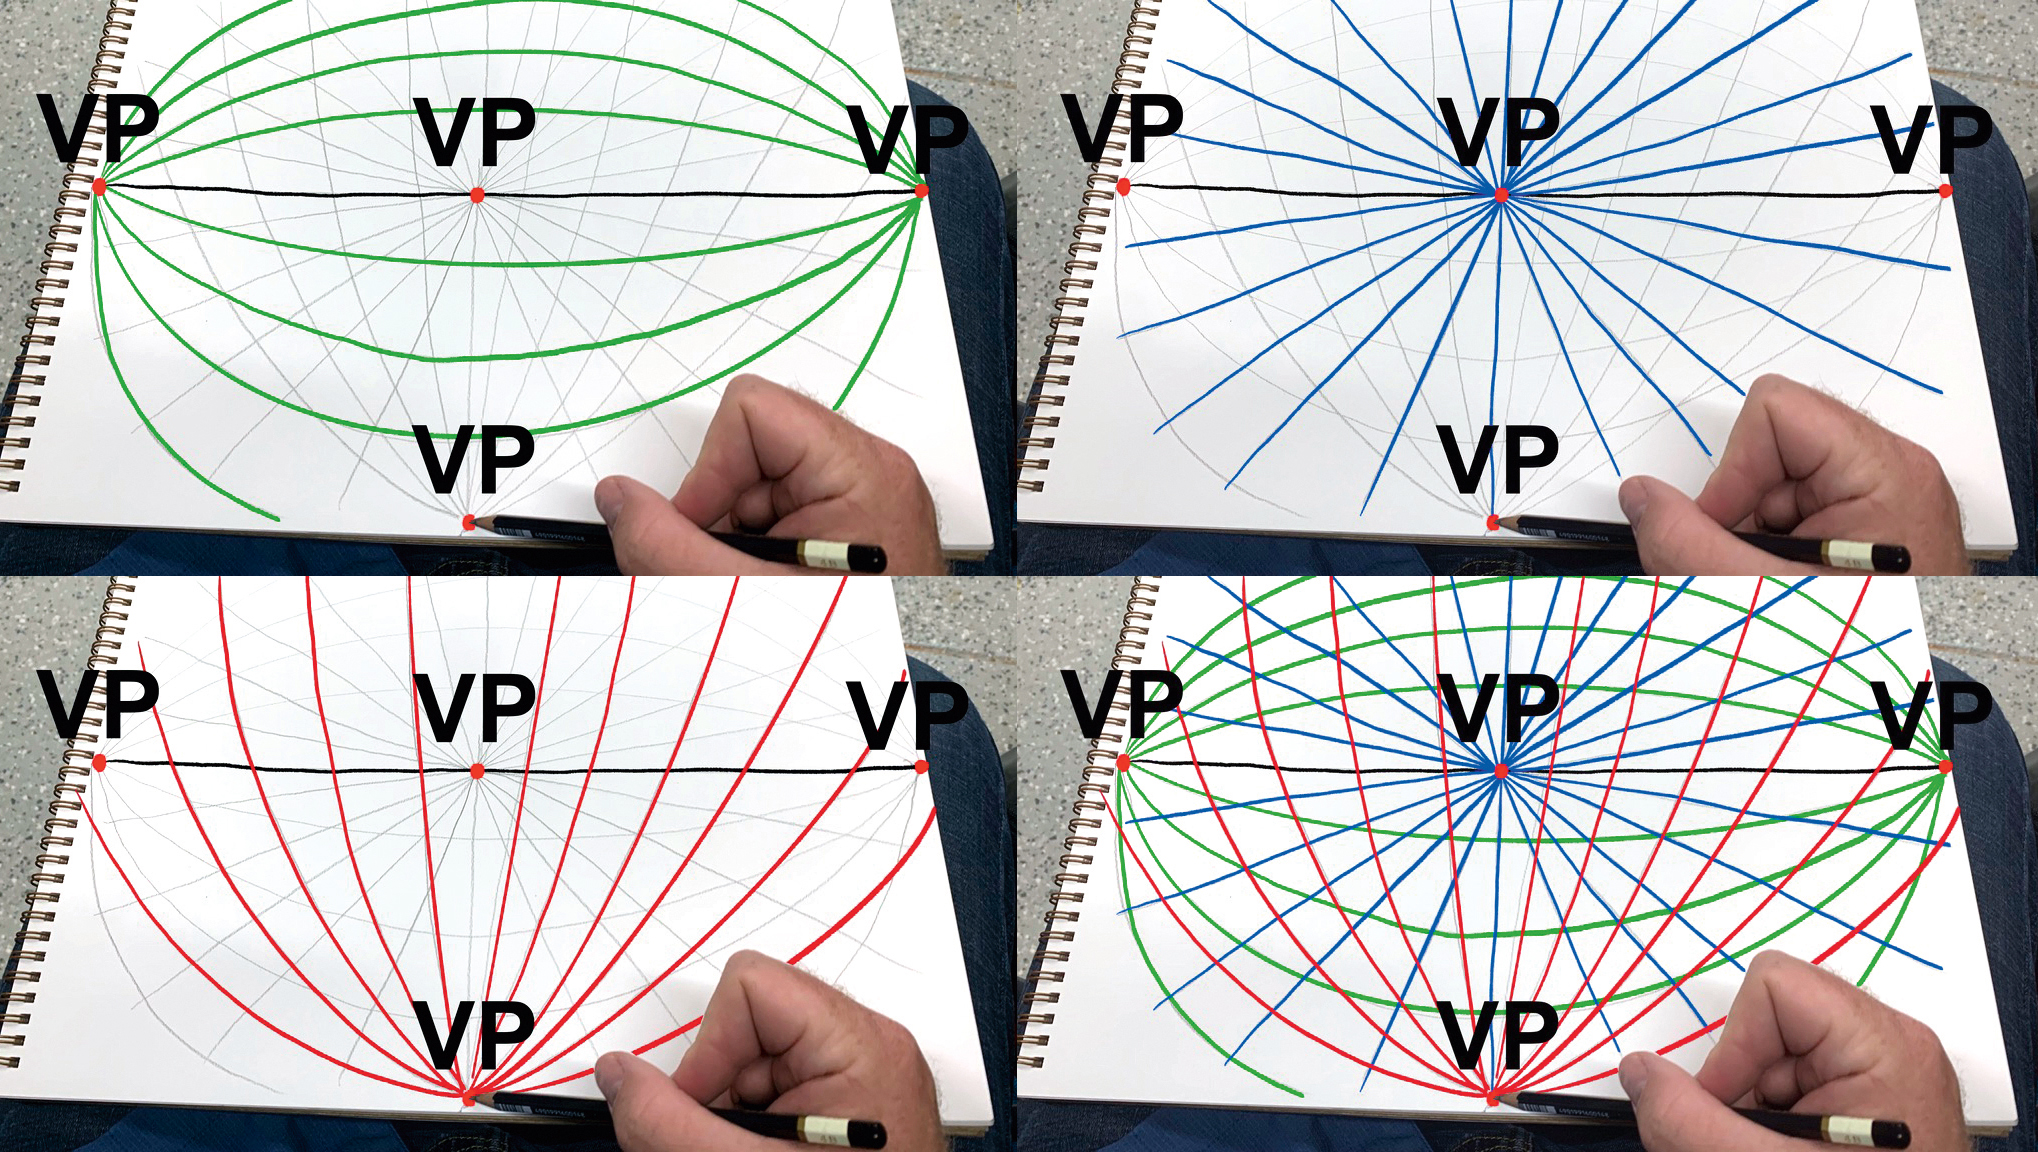
(Prototype: © Paul Heaston)
Start with a horizon line simply over halfway up the page. Add a centre vanishing point (VP) on the horizon, ane VP each on the left and right edges of the newspaper, and 1 at the bottom direct below the eye VP. Draw increasingly curved arcs connecting the left and right VPs in a higher place and beneath the horizon. Add straight lines radiating from the centre VP and lines gently arcing upwards and out from the bottom VP.
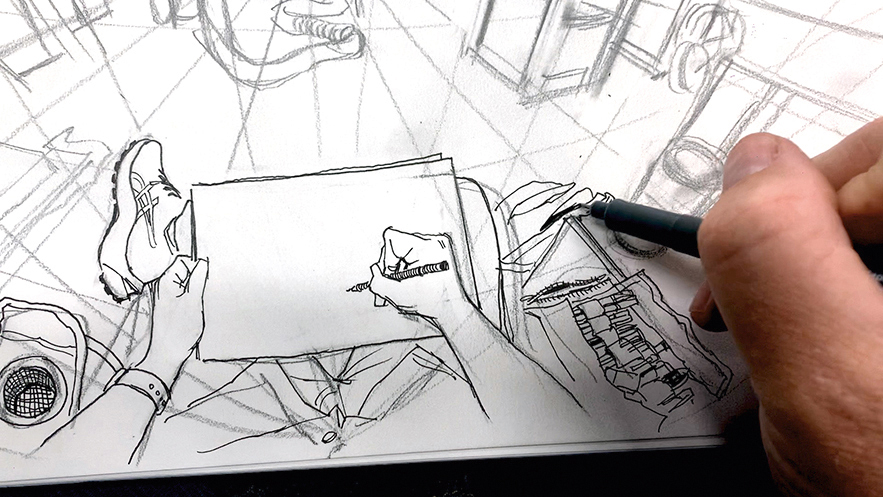
04. Draw the foreground first
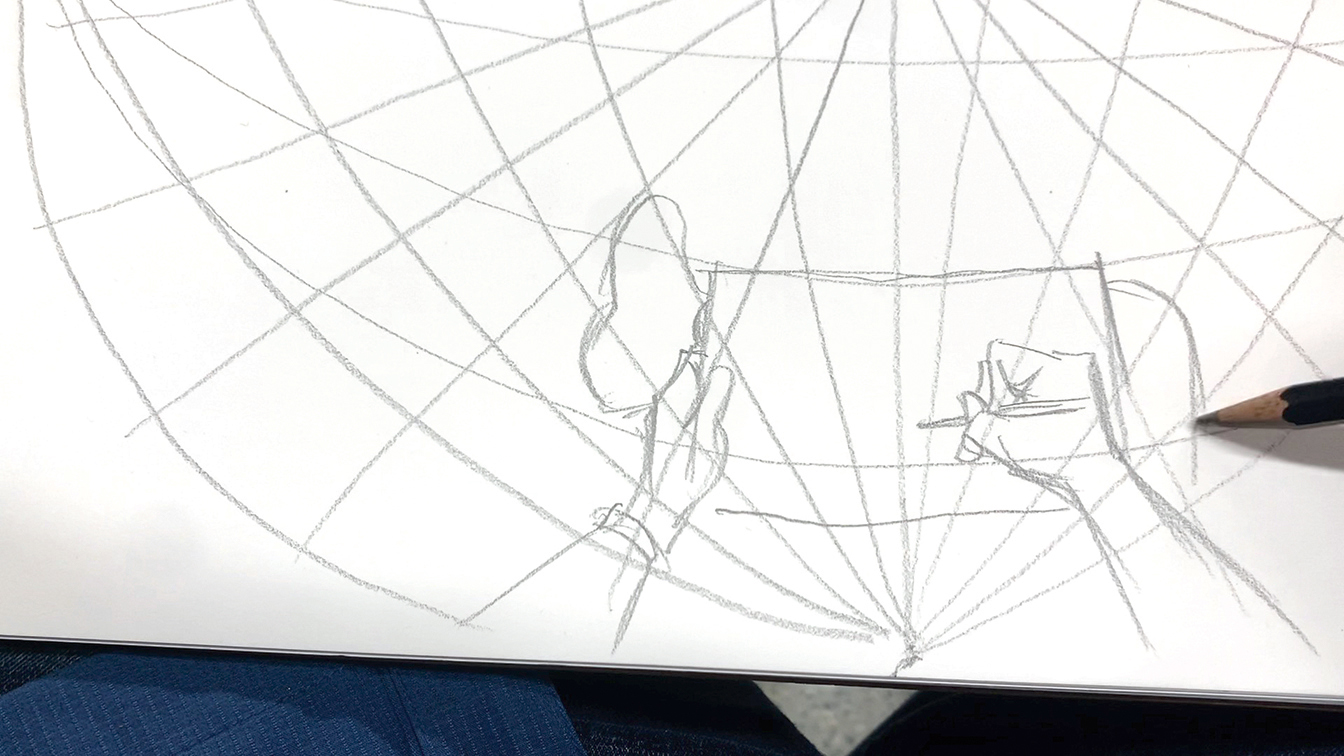
(Paradigm: © Paul Heaston)
In pencil, loosely sketch your hands, sketchbook or drawing surface, and anything else that might be in your immediate foreground (legs, chair, piece of work surface and so on). The scale you lot choose for this portion of the cartoon is important because this will establish a scale reference for the residue of the cartoon.
05. Block in the basic shapes
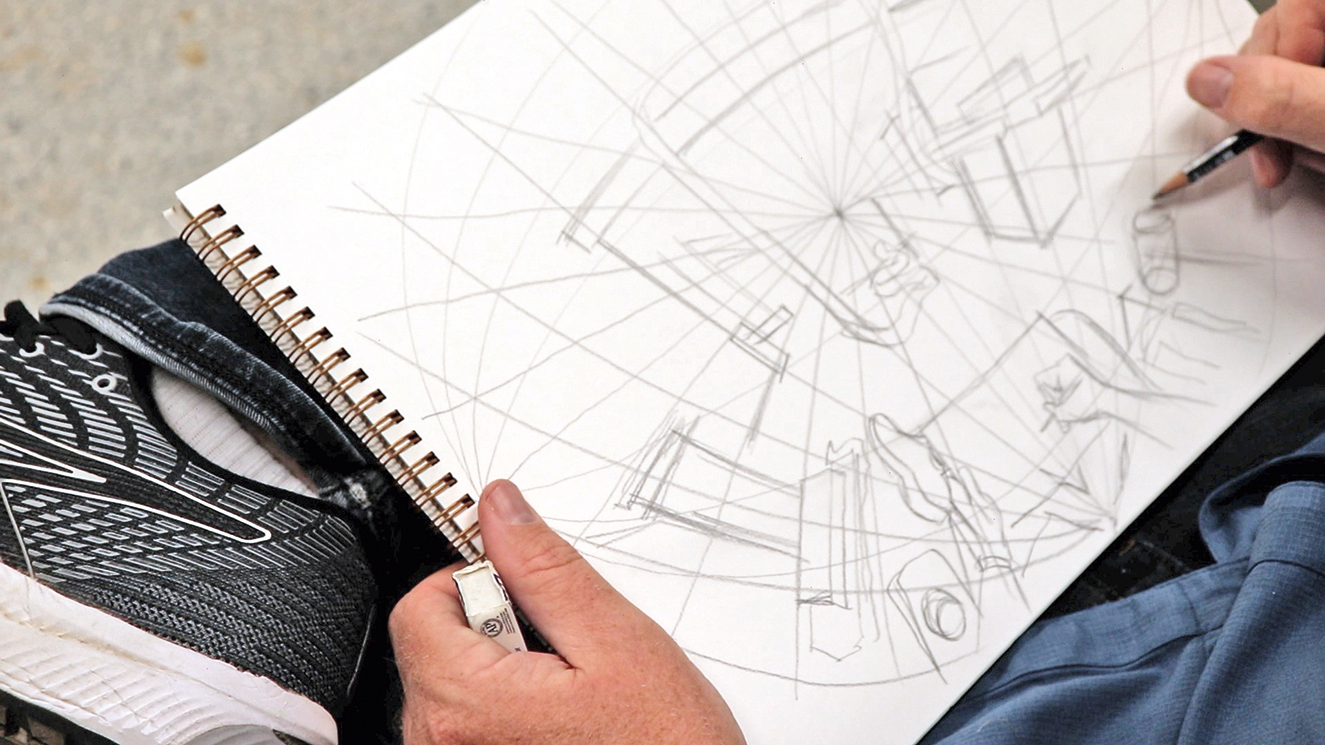
(Epitome: © Paul Heaston)
Using the filigree as a reference for management and your foreground every bit a reference for scale, roughly pencil in the biggest portions of your field of view. I like to work roughly left to correct and foreground to background in successive passes, correcting as I meet fit to continue everything in proportion.
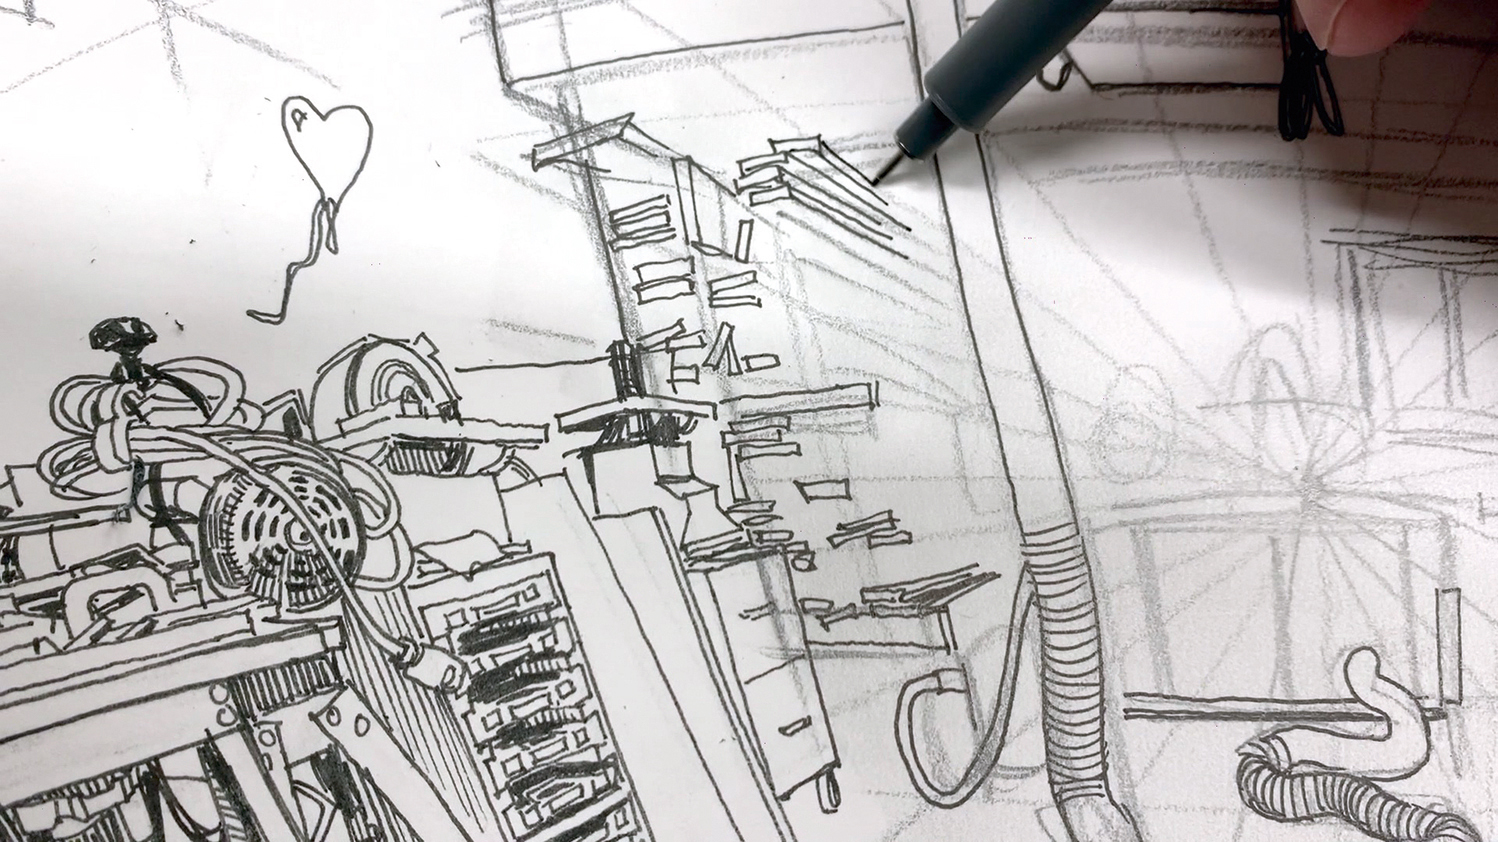
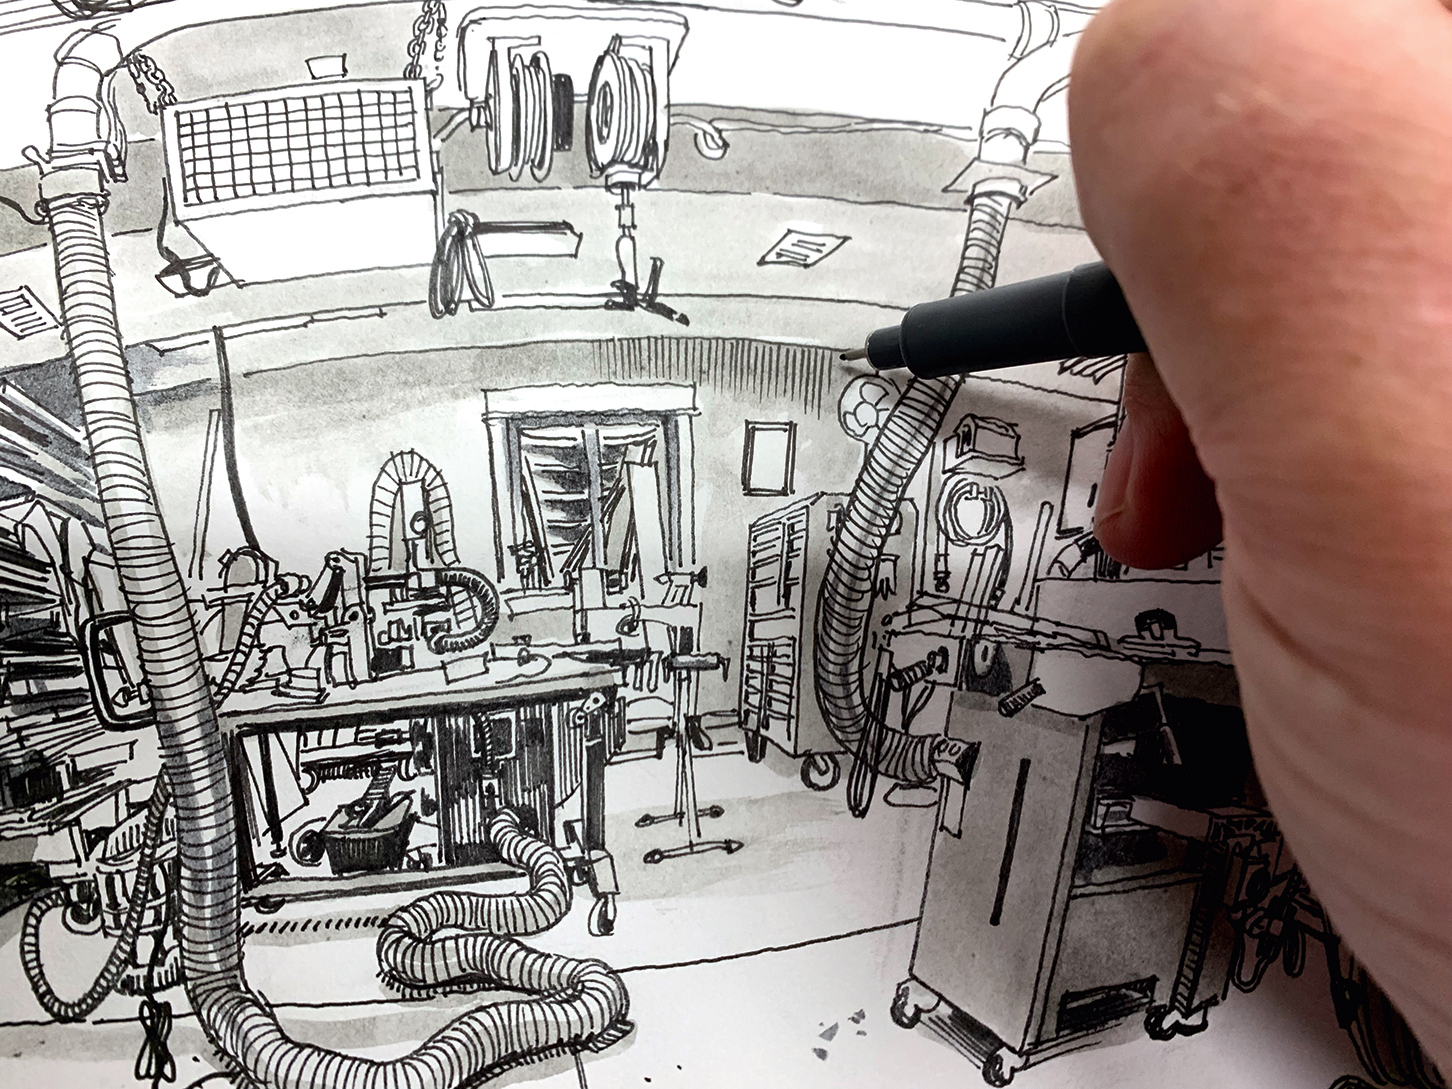
06. Ink over your line-art
(Image: © Paul Heaston)
An underdrawing is a rough draft. Equally you add ink you lot'll run into things you lot want to alter as you get. Feel free to move elements, alter scale and proportion, and fix perspective issues right and so and there, and add together whatever information that wasn't in the underdrawing. You lot're not beholden to earlier choices that you made in the pencil sketch.
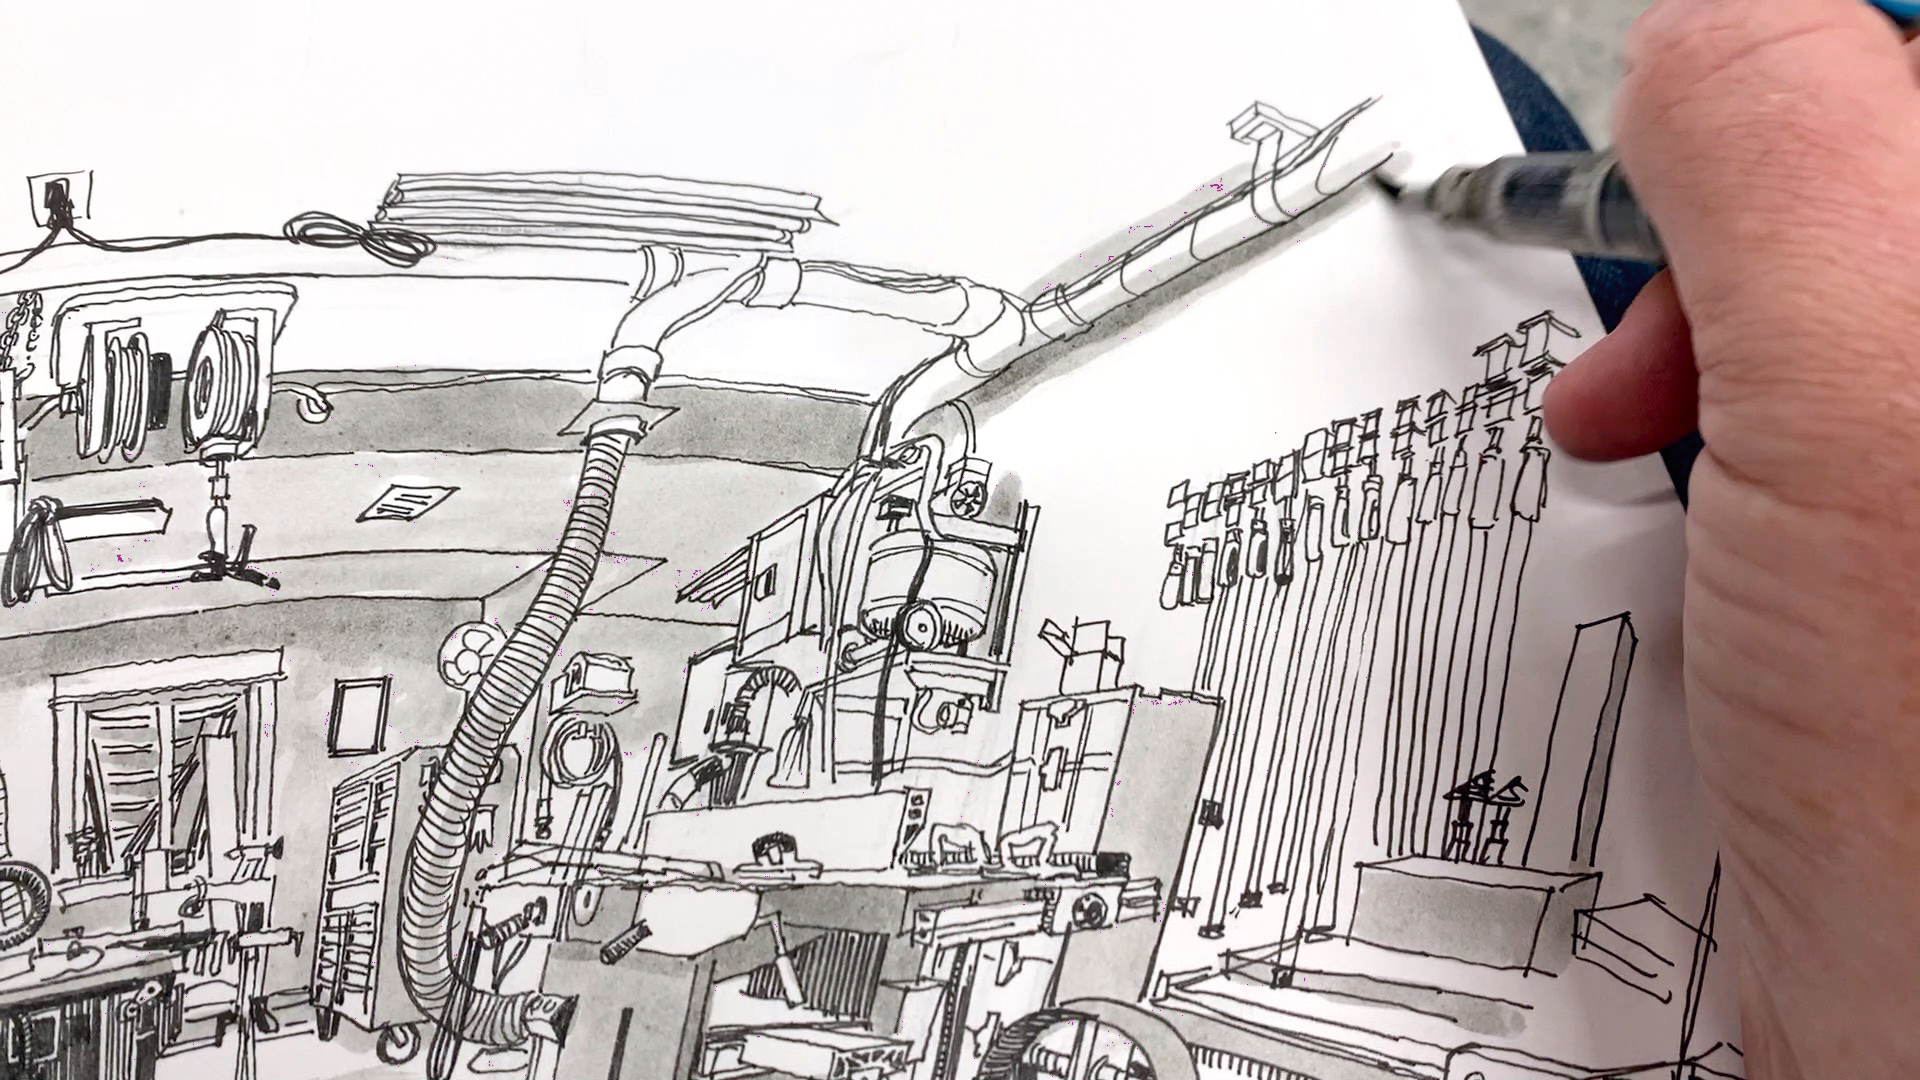
07. Draw the leading edges and surfaces
(Image: © Paul Heaston)
When you accept a big, messy visual element similar a pile of lumber receding away from the viewer, it can be tricky to know where to start. Keep information technology simple; accost all the nearest surfaces and edges outset and then draw the lines receding away toward the vanishing indicate once the foreground portion is washed.
08. Keep drawing and erase as you lot get
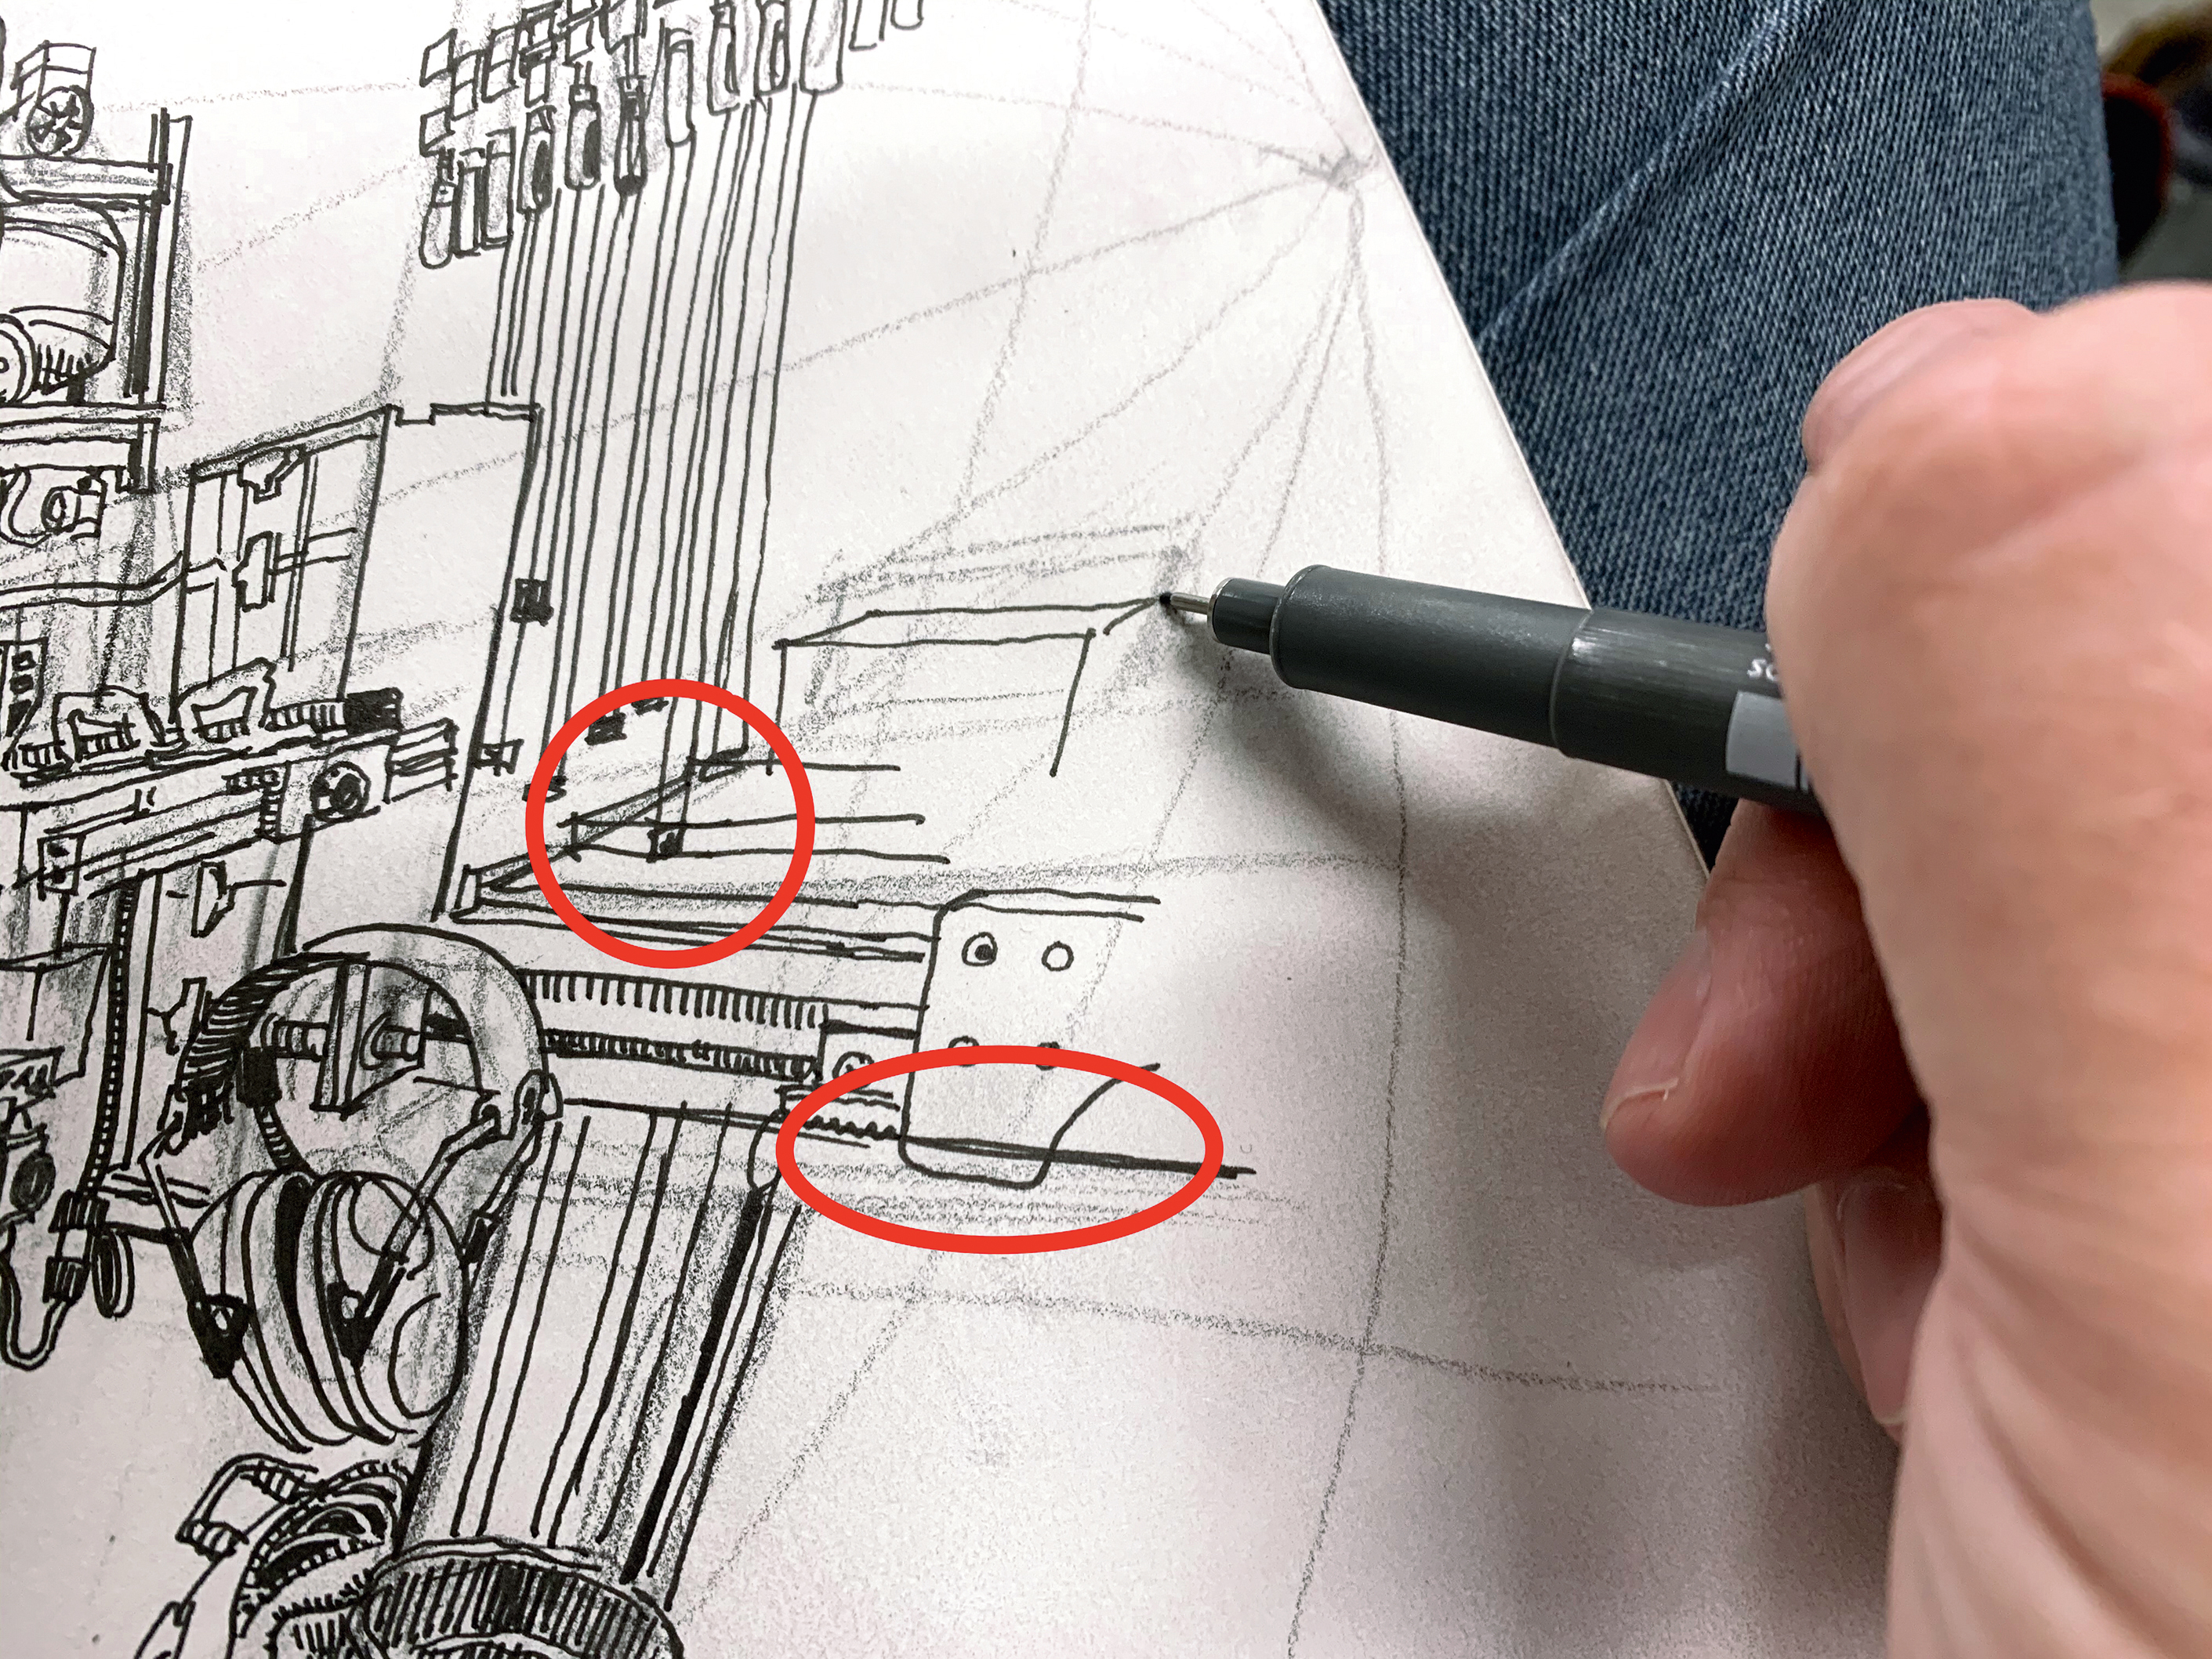
(Image: © Paul Heaston)
Of class, ink is permanent and y'all will brand mistakes. I make tons of 'em. Merely draw right over them. Of form you should fix the stuff that isn't working, merely don't worry most the mistakes yet beingness visible. In a wide-bending sketch the visual impact of the whole is greater than the sum of its parts. This sounds obvious, but even I need to remind myself to tidy up now and then so I accept a clearer picture show of what's happening in the drawing. Frequently it'south but after you erase the underdrawing that you can see where additional ink piece of work needs to be washed, as well as any mistakes that need addressing.
09. Add values to make it pop
(Image: © Paul Heaston)
The heavy lifting in a sketch is done when the values are added. I use hatching and ink launder to push button contrast and transform the linear forms into something that feels 3-dimensional. Don't be timid here: a adept, contrasty drawing is much more appealing than a done-out, halfway finished 1.
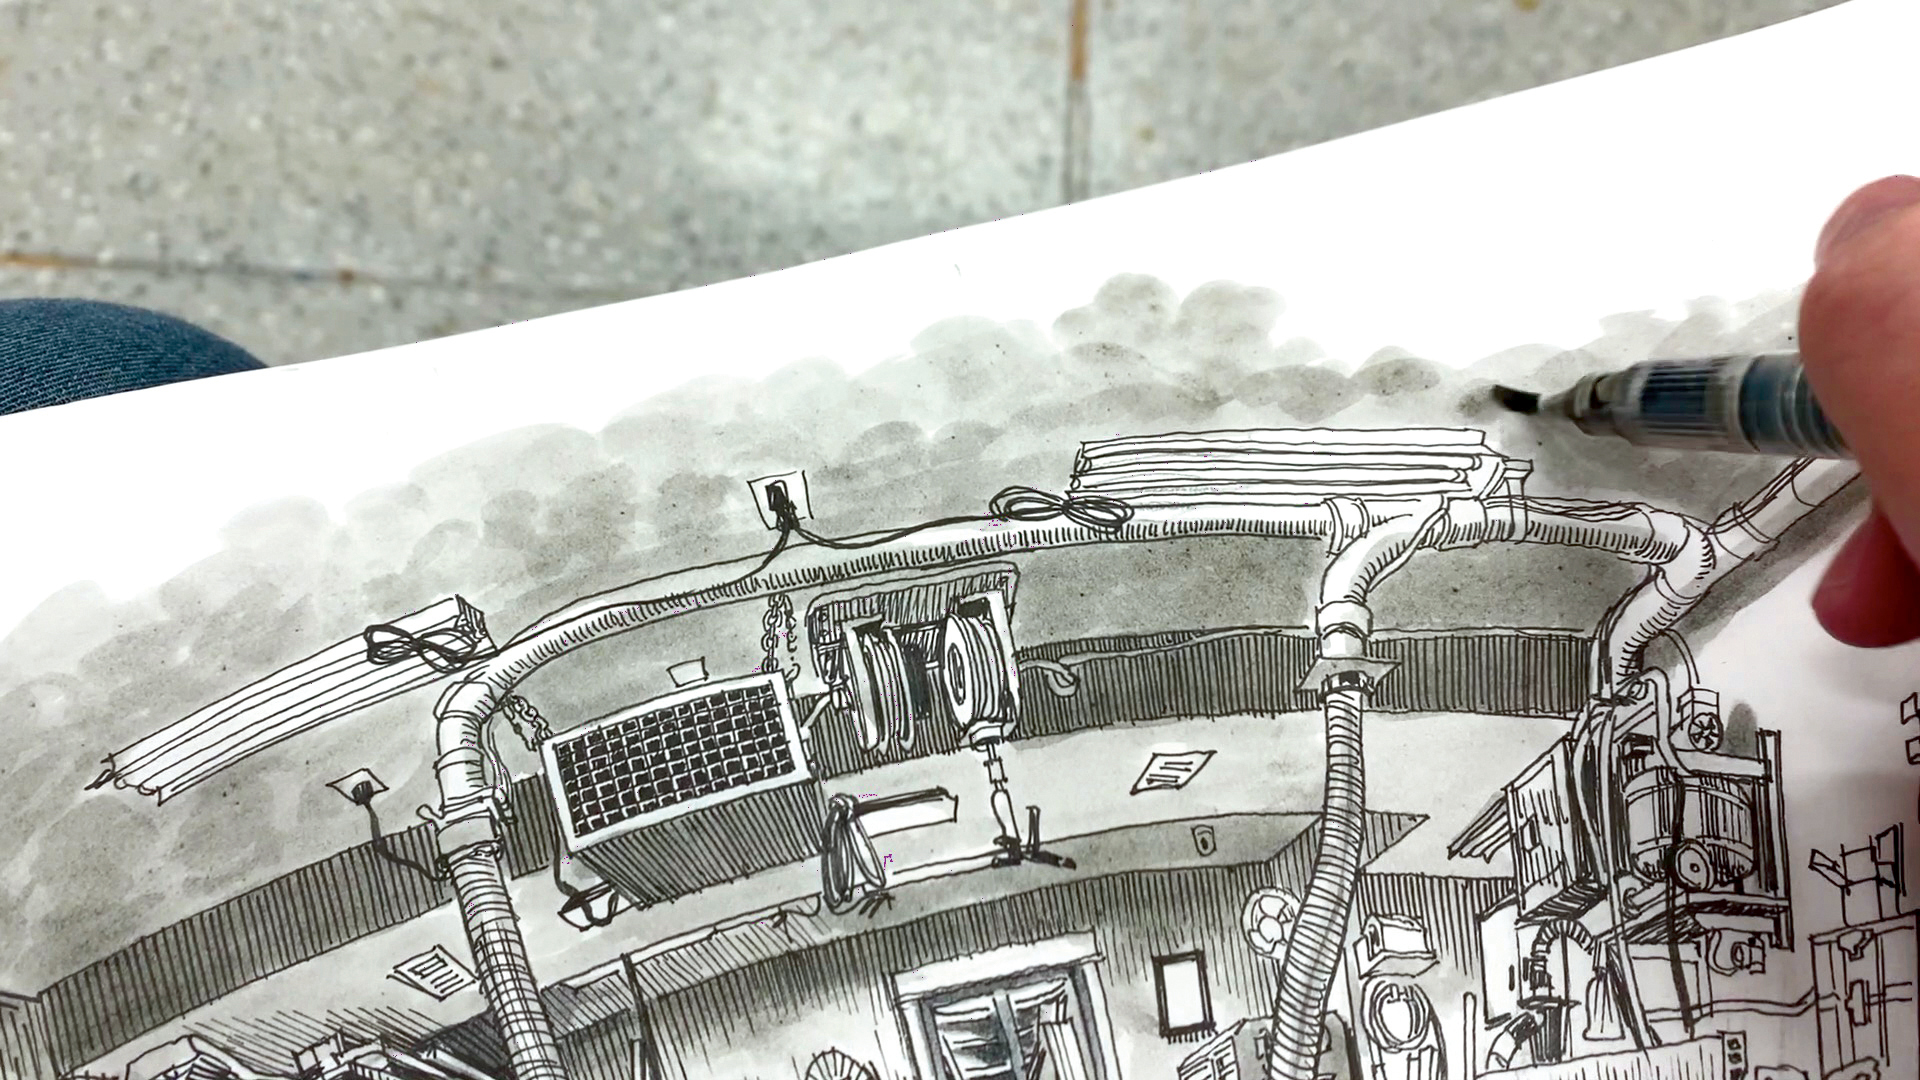
10. Ink wash in a brush

(Paradigm: © Paul Heaston)
This is a fob I learned from artist Ed Mostly out of Bathroom, England. I use Noodler's Lexington Grey fountain pen ink in a Kuretake water brush diluted with water to add together grey values. It's an ingenious way of making ink wash portable and information technology's so convenient and mess-costless, I utilise it in my home studio equally well.
11. Create shadows with vertical hatching
(Image: © Cartoon wide-angle perspective)
To create a lot of my values I utilise a mix of hatching and ink wash. Vertical hatching is a good way to lay downwards a lot of value quickly and it'southward hard to screw upwards. I use the give-and-take "vertical" loosely, as I like to keep my hatch marks consistent with the perspective and indicate toward the lesser vanishing point.
12. Layer your washes
(Image: © Paul Heaston)
The nice thing about a waterproof ink wash is, one time dry, you can apply more than wash to get darker. This mode yous tin build upwards to the darkest values without worrying well-nigh overdoing it on the get-go pass. Keep several water brushes handy with different shades of grey to speed up the process.
13. Dab big apartment areas
(Image: © Paul Heaston)
To keep a large apartment area from appearing either unaddressed or overworked, attack the space with low-cal dabs, flecks and speckles of wash. You lot can layer these marks to make areas darker gradually without the frustrating streaks and tide marks that come up with trying to achieve a smooth gradient in wash.
fourteen. Use white pen for highlights
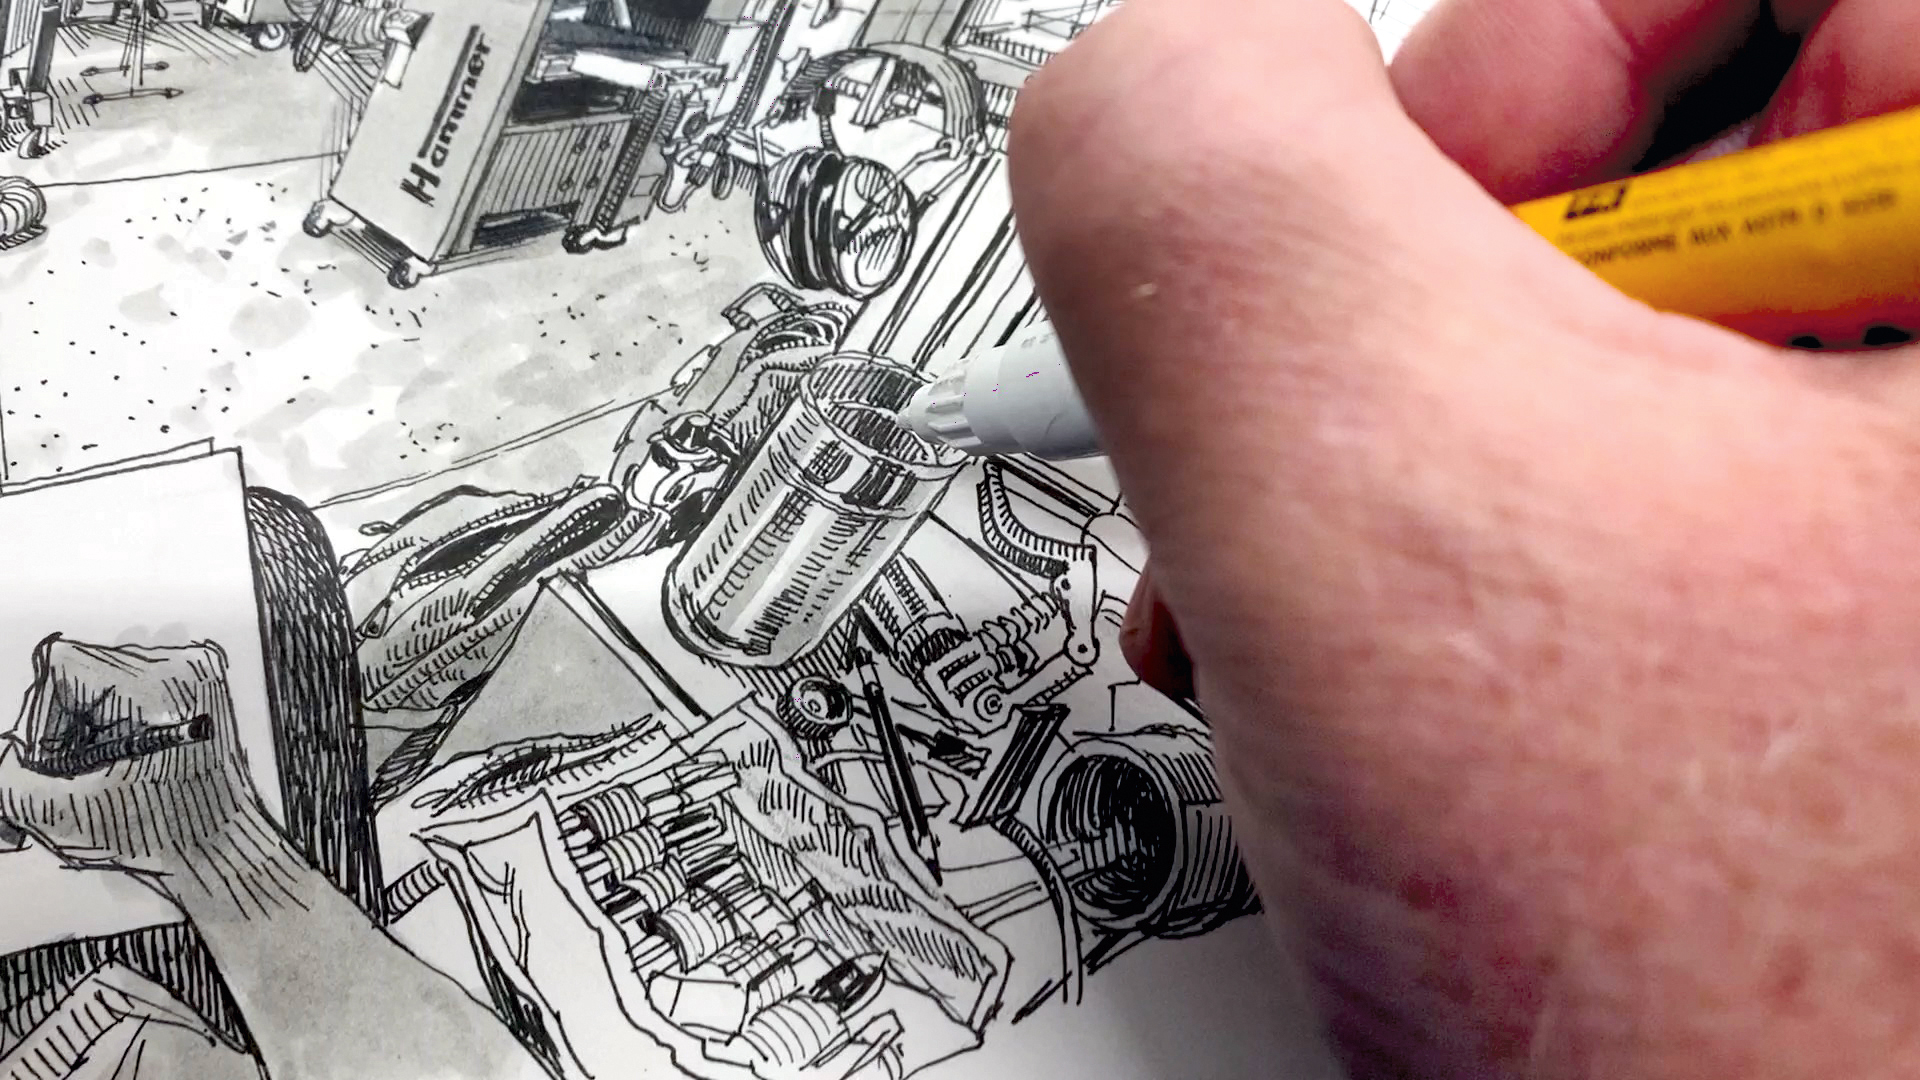
(Image: © Paul Heaston)
Information technology's a minor thing just when washed correctly, adding a few white highlights can make a black and white sketch sing. Wait for where the whitest whites should be in your drawing (lights, reflective surfaces and so on). Just a couple of subtle white highlights on the rim of this metal canister actually make information technology pop and feel metallic.
This article originally appeared in ImagineFX , the world'south all-time-selling magazine for digital artists. Subscribe here .
Related articles:
- Be inspired by these 22 incredibly realistic pencil drawings
- Become technical: larn how to draw easily
- More advice on how to describe perspective

Source: https://www.creativebloq.com/how-to/draw-5-point-perspective
Posted by: perezthavall.blogspot.com
0 Response to "How To Draw A Fish Eye"
Post a Comment